 What do you do when your inkjet printer starts giving out flawed prints? What do you do when there’s no ink on the print at all? All of us berate the printer and use some censored words a few times but what do we do next? What we do is get a new printer ink cartridge. Most of us don’t even bother considering the fact that there’s still ink in the cartridge and that the culprit is a blocked printer head.
This is especially surprising because 98 percent of the time, the reason for white lines is that the nozzles of the printer head are blocked with dried-up ink. Some of us don’t do anything about it because we don’t really know the printer head cleaning process and it’s easier to buy a new ink cartridge.
However, if you knew how the printer head cleaning process worked, you would be able to deal with the clogged or blocked printer head. This would allow you to save money in the short, medium, and long term. So, how do you go about dealing with a blocked printer head? Here’re the steps that you should ideally follow.
What Is A Printhead?
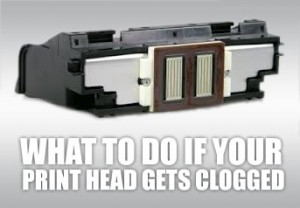
A printhead is a part of the printer typically located inside printer cartridges. It includes electrical circuits and nozzles. The main purpose of it is to put ink on the paper. For that, it receives instructions from the printing processor and figures out the values such as intensity and location of ink and how much ink is required to print a document. Ultimately, it sprays the ink on the paper according to the instructions and its evaluations.
Where’s Your PrintHead?
A printer head is generally found under the cover of your printer – just under the plastic carriage called printhead assembly. It can only be found in inkjet or dot matrix computer printers. A printhead assembly is a place inside a printer where ink cartridges are placed.
Using The Printer’s Self-Cleaning Mechanism
The simplest way to clean a blocked printer head is to use the printer’s self-cleaning mechanism. However, this mechanism is only useful for lightly blocked printer heads. The older your inkjet printer and cartridge get, the less useful this method will become. Still, in the earlier stages, it can be very effective.
This mechanism is available with most modern printers but the method of activation may vary from one brand to another. Some brands have a button on the printer that you can press to activate the self-cleaning mechanism, while others have the command available in the software. In the latter case, you’ll have to open the ‘properties’ tab of the specific printer from the ‘printers’ section of the ‘control panel’.
Using Air through the Channels to Push Dry Ink Out
In the majority of cases, printers’ self-cleaning mechanisms clean blocked printer heads by flushing the nozzles with air. The air works to dislodge dry ink inside the cartridge channels and also push it out. The intensity of the self-cleaning process of printers is usually not very strong.
This means that if you can find a way to increase the air pressure inside the cartridge channels, then it will probably clean the cartridge faster. The only way to do this would be to use a pipe of the right diameter. This pipe will need to be attached to the nozzle of the cartridge on one end and a handheld vacuum cleaner on the other.
The vacuum cleaner can be used to either blow air into the cartridge or suck the dry ink out. When you blow air into the cartridge, you’ll see ink coming out from the other end. Keep in mind that nozzle channels in your cartridge are delicate and can’t take too much air pressure. So, try to control the pressure from the vacuum cleaner.
Using Isopropyl Alcohol to Dissolve Dry Ink
 Dry ink can be tenacious and very difficult to deal with. This is especially true in the case of blocked printer heads because the space in which the ink dries is extremely delicate in nature. On one end, most ink cartridges have a sponge which is responsible for the delivery if ink to paper.
This sponge is very fragile and susceptible to substances. For instance, it can dissolve very quickly if you’re not careful about the substances it comes in contact with. So, when the ink dries up inside this sponge, it can become a challenge to counter a blocked printer head.
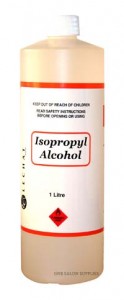
The sponge end of a blocked printer head can be cleaned with only one liquid other than water. This liquid is isopropyl alcohol. Isopropyl alcohol isn’t strong enough to melt the sponge but is still strong enough to dissolve the ink inside the blocked printer head. Even isopropyl alcohol can’t be used freely. It needs to be administered softly and carefully. This is why a dropper or syringe is recommended.
You can take either of these tools. Fill the chosen tool up with isopropyl alcohol, and squirt it into the sponge side of the ink cartridge so that it gets inside the blocked printer head. You need to make sure that you inject a good amount of isopropyl alcohol into the blocked printer head or it won’t be able to dissolve the dried-up ink.
Using the Soaking Method on the Blocked Printer Head
If all else fails, the last method that you can try to deal with blocked printer heads is to soak them in water. This may be the slowest method but it’s also the most effective. Here are the steps you need to follow to unblock a blocked printer head by the soaking method.
- Detach the blocked printer head from the printer and place it on tissue paper.
- Take a shallow pan (a baking tray will work) and layer a microfiber cloth or paper towel at its base. Ideally, the pan should not be metal or porcelain as hard substances can damage the blocked printer head. Try to get a plastic pan. The purpose of the paper towel is also to prevent contact between a hard surface and the blocked printer head.
- Now you need to take clean water (purified, bottled, or distilled) and heat it. The water needs to be heated but not boiled. Boiled water can seriously damage your blocked printer head so be very careful.
- Mix the heated water with ammonia and gently put it in the pan. A 1:1 ratio works fine between ammonia and water. The water doesn’t need to be very high. About half an inch should be enough.
- Now, you need to gently place the blocked printer head onto the paper towel inside the shallow pan.
- You need to keep moving the blocked printer head to a new spot in the shallow pan after regular intervals of a minute or two. If you shake the blocked printer head gently, then you’ll speed up the process.
- You should see ink bleed out of the blocked printer head. If you don’t see it immediately, increase the duration of the soaks till you do.
Preventing Ink from Drying In The First Place
Every time your printer head gets blocked, you can use a printer head cleaning process, whether it is the printer’s inbuilt mechanism or the elaborate soaking method, to save money. The main reason why a printer’s head will get blocked is lack of use.
Printer ink is designed to dry up quickly. In this regard, it isn’t much different from a cup of coffee. If you leave the coffee open, then you’ll see a semi-solid film on top of it. This is precisely what happened to printer ink. When you don’t use your printer regularly, it causes the ink in the nozzles to gradually dry up to a point where it begins blocking the passage of fresh ink from the cartridge.
Moreover, if you haven’t used your printer for a while, then the ink can actually solidify into small fragments. Therefore, the best way to prevent blocked printer heads in the first place is to use your printer regularly. Even if you don’t need to print anything, you should do a test print with any of these test patterns.
Ideally, your printer should be worked every day but every other day will work too. What you should never do is let your printer lie fallow for more than a week as that will not only result in a blocked printer head but may even cause irreversible damage to your printer over time.
Leave a Reply