Canon PGI & CLI Series Ink Cartridge Installation Instructions
Canon PGI/CLI Cartridge Installation Instructions
Stage 1:
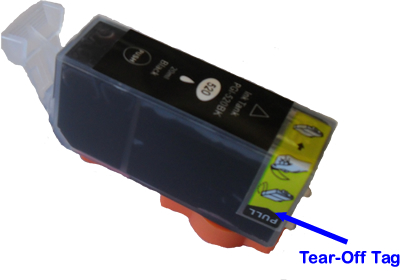
1. Remove cartridge from its packaging.
2. Remove the plastic wrapping.
3. Leave orange cap on.
4. Locate Tear-Off tag as in Picture to left
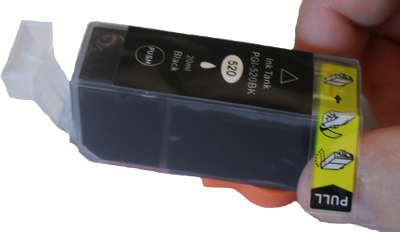
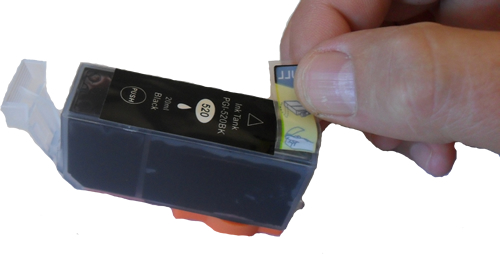
Stage 2:- Slip thumb under Tear-Off Tag as below, then pinch tag with forefinger. Gently pull Tear-Off Tag as below and gently place back down on working area.
Stage 3
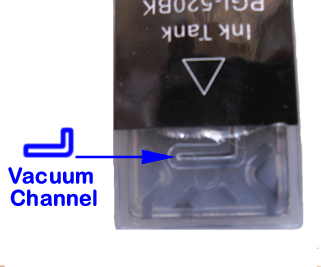
1.
IMPORTANT: Examine the vacuum channel
as to the right to ensure no residual parts of
the Tear-Off Tag are remaining which may cause
an air-flow blockage resulting in blank prints.
2.
IMPORTANT: If there is residual tear-off
tag or adhesive left in the vacuum channel,
then a vacuum will not form and ink will fail
to flow, resulting in blank prints.
NOTE: Use a sharp instrument to remove any
such obstructions in this channel. If in
doubt, remove the top label in its entirety.
Stage 4
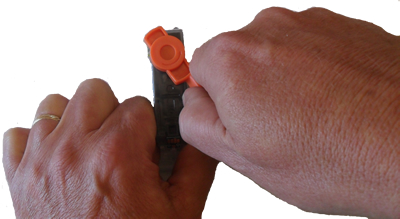
1. Turn cartridge upside down and place on work area.
2. Using both hands as below, hold the cartridge with one and turn the cap anti-clockiwise to remove.
3. IMPORTANT: Carry cartridge to printer upside down and then flip to insert into printer.
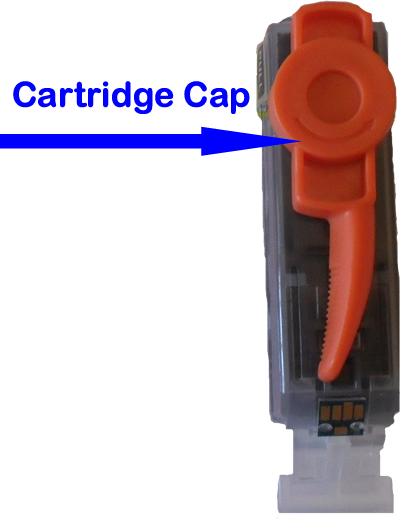
Cartridge Cap
Turn Cartridge Cap
Anti-Clockwise to remove
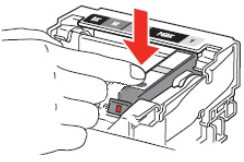
Install cartridge to printer with a firm click. If the press of the cartridges does not produce a firm click sound, remove and bend clip tag out slightly and then refit
IMPORTANT NOTE: If ink fails to flow or prints are blank, remove cartridge and check vacuum channel. If after doing this procedure, prints are still blank, lines will need re-priming. Click HERE and download the corresponding colour/s primer pattern. Print two prints of the page and then return to normal printing.
Copyright(c) 2009 Inkjet Wholesale


 Ink Cartridge Wholesale Carton Packs