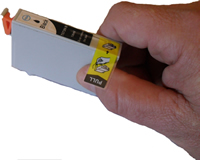
Stage 3
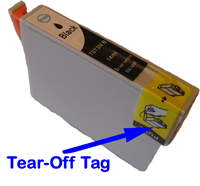
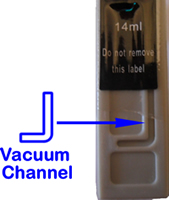
1. IMPORTANT: Examine the vacuum channel as in pic to right to ensure no parts or residue of the tear-off tag are left behind in the channel and blocking air and ink flow.
2. IMPORTANT: If there is residue left in the channel, then a vacuum will not be created and ink will not flow. Use a sharp instrument to remove any residue obstructions in this channel.
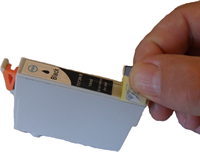
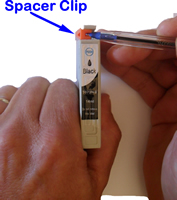
Stage 4
Now move to the rear of cartridge and remove the spacer as in Pic to right
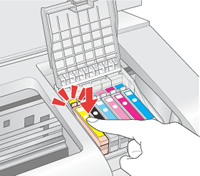
Stage 5
Insert cartridge into printer and allow to sit for 2 minutes, then perform a print head clean
EPSON ERROR CODES AND MESSAGES1. Ink Cartridge Recognition Issues

FIGURE 1: Typical popup screen that indicates a generic cartridge is empty of black ink.
Occasionally when using generic brand cartridges a popup screen like in Figure 1 above may appear. Such could be due to:
1. In the vast majority of situations this is simply due to the fact that the ink cartridge is actually empty of ink and this is the way the generic cartridge indicates such. If the printer has been printing fine and all of sudden this error occurs, then this nwill indeed be the case. To remedy the situation, change the cartridge over for a new one.
2. There is actually a failure with the chip that is located on the cartridge. If the cartridges has just been fitted and this error popup occurs:
a) Please remove cartridge from the printer.
b) Remove the power cable from the rear of the printer.
c) Wait 5 minutes, then re-install the power cable.
d) Turn on the printer with the power button on front of printer.
e) Wait while the printer goes into standby.
f) Refit the cartridge that was previously removed.
g) Wait for printer to cycle into standby.
h) Remove power cable from rear of printer.
i) Wait one minute, then refit power cable to rear of printer.
j) Turn printer on again and wait for standby.
k) Return to printing, ensuring that you also now do a print head clean and alifnment as per the instructions for your printer.
3. Sometimes, there is nothing wrong with the ink cartridge, but the recognition issue persists. This is usually because the printer is connected to a PC which is connected to the internet and the eeprom programming of has been updated by the manufacturer. When installing the printer for the first time you would have been asked whether you wanted the printer to automativclly update its software. Figure 2 screen is a popup that indicates this situation. To avoid potential conflicts with generic cartridges we recommend checking the DO NOT DISPLAYTHIS MESSAGE AGAIN checkbox and then clicking on Decline as per Figure 3 below.

FIGURE 2: Typical popup screen that asks for permission to do auto updates during the first install procedure.

FIGURE 3: Tick "Do not display this message again" and then click on "Decline" button as above.
If when you first installed the printer, you agreed and accepted auto updates, and the ink recognition issue still exists and you have undertaken steps 1 and 2 above, then the only way to remedy the problem is to turn off the printer, then uninstall the printer completely from the PC, then shut down computer, then re-install with original driver disc and ensure that auto updates are declined as per Figure 3 and Figure 4. If you do not have your original driver disc, you will need to download such from the manufacturer. Be sure to disconnect the USB cable to the printer before installing the new driver and only plug in the USB cable when told to do so by the install procedure. Then once installation is complete, rebooy PC and once in standby try printing again.
If after all the above steps have been undertaken the ink recognition issue persists, then its likely the chip on the cartridge has failed or there is a fault with the processor board inside the printer. Contact retailer for replacement cartridge to rule out the former and if such does not remedy, then there is a fault with the printer that will need professional repair. Often such repoairs are economically prohibitive and so our recommendation would be to purchase a new printer.

FIGURE 4: Another typical popup screen that asks for permission to do auto updates during the first install procedure. Again recommendation is to reject such updates as such can conflict with the use of generic cartridges


 Ink Cartridge Wholesale Carton Packs